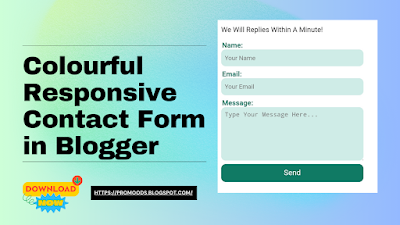
Colourful Responsive Contact Form in Blogger
Welcome to all, in this article i have share Colourful Responsive Contact Form in Blogger. So carefully read this article and click download button or save this file your computer or device file manager.
Contact form if you have a blogger website then you need to add Colourful Responsive Contact Form in Blogger Contact us pages.
But in Blogger thare is no way to add contact form in contact us pages. So, you need to add contact form manually in your contact us page.
Follow the below instruction to add contact form in your contact us pages.
1. Go Blogger Dashboard.
2. Go Pages Section.
3. Create a new pages.
4. View html mode.
5. Copy Download code and paste your pages.
6 Now Published your pages.
| Scripts Information |
|---|
| Script Name: Colorful Contact Form |
| Platform/CMS: Blogger |
| Developer: Hasan it Solution |
Download
1. Go To Blogger Dashboard.
2. Create New Pages
3. Now copy the script & pest your Pages.
4. Published your pages.
<link rel="stylesheet" href="https://cdnjs.cloudflare.com/ajax/libs/font-awesome/4.7.0/css/font-awesome.min.css">

<div class="custom-contact-form">

<h2>Contact Us</h2>

<p>We Will Replies Within A Minute!</p>

<form name="contact-form">


<div class="contactf-name">
<legend><i class="fa fa-user-circle-o"></i> <b>Name:</b></legend>
<input id="ContactForm1_contact-form-name" type="text" placeholder="Your Name" required/>
</div>

<div class="contactf-email">
<legend><i class="fa fa-envelope"></i> <b>Email:</b></legend>
<input id="ContactForm1_contact-form-email" type="email" placeholder="Your Email" required/>
</div>

<div class="contactf-message">
<legend><i class="fa fa-comment"></i> <b>Message:</b></legend>
<textarea id="ContactForm1_contact-form-email-message" type="text" placeholder="Type Your Message Here..." required/></textarea>

<br/>

<input id="ContactForm1_contact-form-submit" type="button" value="Send"/>

<div class="contact-form-error-message" id="ContactForm1_contact-form-error-message">
</div>

<div class="contact-form-success-message" id="ContactForm1_contact-form-success-message">
</div>

</div>
</form>
</div>

<style>
.custom-contact-form {
text-align: left;
}

.contactf-name {
margin-bottom: 8px;
}
.contactf-name input {
height: 38px;
width: 320px;
text-align: left;
border-radius: 10px;
border: none;
background: #D0ECE7;
font-size: 14px;
outline: none;
padding: 8px;
}
.contactf-name .fa {
color: #117A65;
}
.contactf-name legend {
color: #117A65;
}

.contactf-email {
margin-bottom: 8px;
}
.contactf-email input {
height: 38px;
width: 320px;
text-align: left;
border-radius: 10px;
border: none;
background: #D0ECE7;
font-size: 14px;
outline: none;
padding: 8px;
}
.contactf-email .fa {
color: #117A65;
}
.contactf-email legend {
color: #117A65;
}

.contactf-message {
margin-bottom: 8px;
}
.contactf-message textarea {
height: 120px;
width: 320px;
text-align: left;
border-radius: 10px;
border: none;
background: #D0ECE7;
font-size: 14px;
margin-bottom: 8px;
outline: none;
padding: 8px;
}
.contactf-message .fa {
color: #117A65;
}
.contactf-message legend {
color: #117A65;
}

.contactf-message input {
height: 40px;
width: 320px;
font-size: 17px;
background: #117A65;
color: #fff;
border-radius: 10px;
border: none;
cursor: pointer;
}

.contactf-message input:hover {
background: #138D75;
}
</style>
Conclusion
In this article, I have shared Colourful Responsive Contact Form in Blogger. I hope you have liked it Please do share it with your friends and follow our blog for more.


Comments
Post a Comment